
Voici un plugin qui promet de se révéler très utile en vérifiant la compatibilité mono d’un mix… Lire la suite sur Audiofanzine

Voici un plugin qui promet de se révéler très utile en vérifiant la compatibilité mono d’un mix… Lire la suite sur Audiofanzine
Initial Audio has announced the release of SourceLab 2.0, a major update to their flagship hybrid virtual instrument for macOS and Windows.
SourceLab 2.0 combines wavetable synthesis, sampling, and loop slicing into a unified 6-layer engine. Version 2.0 introduces a drag-and-drop Skin Editor, comprehensive MIDI CC mapping, and expansive new library additions, positioning it as a complete platform for sound design.
YouTube.com/watch?v=Q1zFJbfAlK4
SourceLab 2.0 is available immediately for Windows (10/11) and macOS (10.13+, native Apple Silicon supported) in VST3, AU, AAX, and Standalone formats:
A fully functional free demo is available to download. No registration required.
Check out the demo videos for the included factory expansions:

Sonarworks’ Spring Sale sees promotional prices applied across the company’s online store and retail channels, and users are able to take advantage of 21-day trial versions to see what the company’s renowned software has to offer.

Un pack de grooves, de percussions et de kits de construction dédié à la tech house latine… Lire la suite sur Audiofanzine
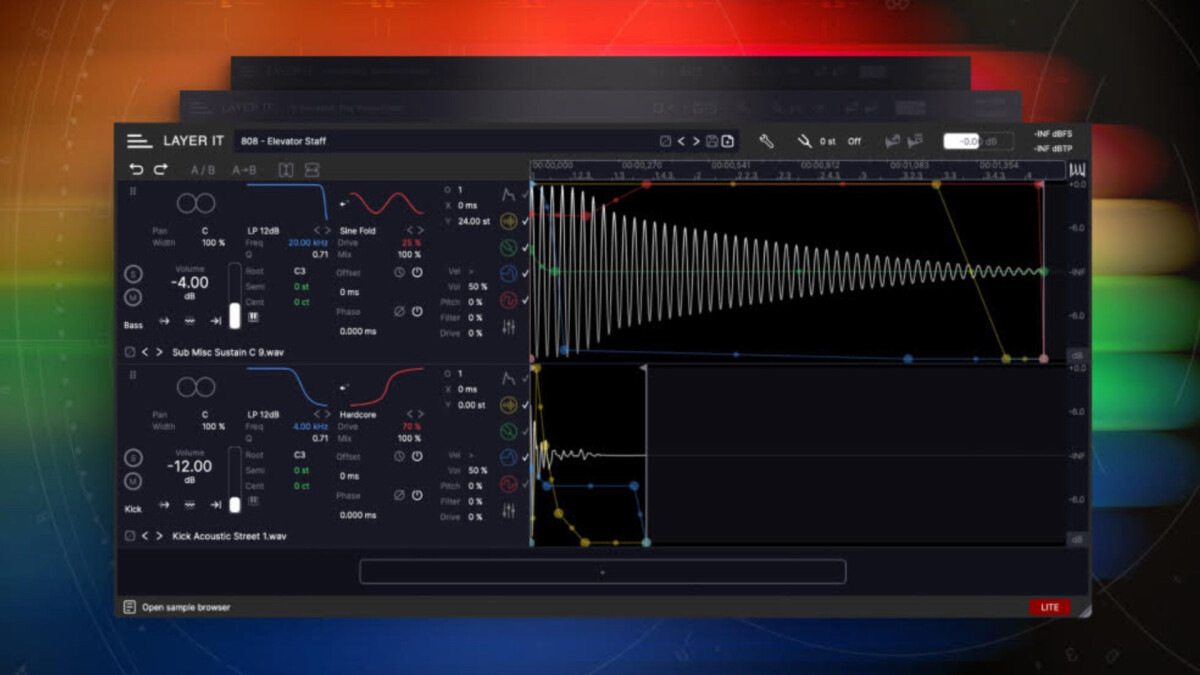
Le développeur Diginoiz propose désormais une version allégée mais totalement fonctionnelle de son plug-in de superposition de sons de batterie… Lire la suite sur Audiofanzine
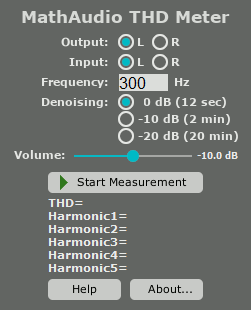
MathAudio has announced the release of version 2.0.0 of THD Meter, the plug-in designed to measure total harmonic distortion (THD) in sound cards, speakers and headphones.
The plug-in applies matched filters for maximizing the signal-to-noise ratio (SNR) in the presence of additive stochastic noise.
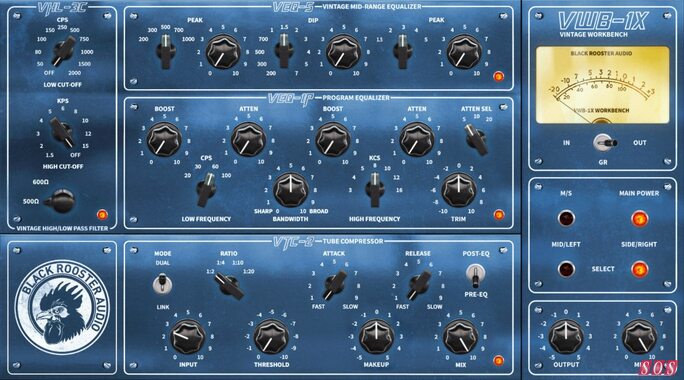
Black Rooster Audio’s latest plug-in has been designed for producers, engineers and sound designers “who demand vintage tone with modern workflow”.
Du geste technique à l’intention musicale : découvrez une méthode avancée pour apporter puissance, groove et espace à vos mixes !.. Lire la suite sur Audiofanzine
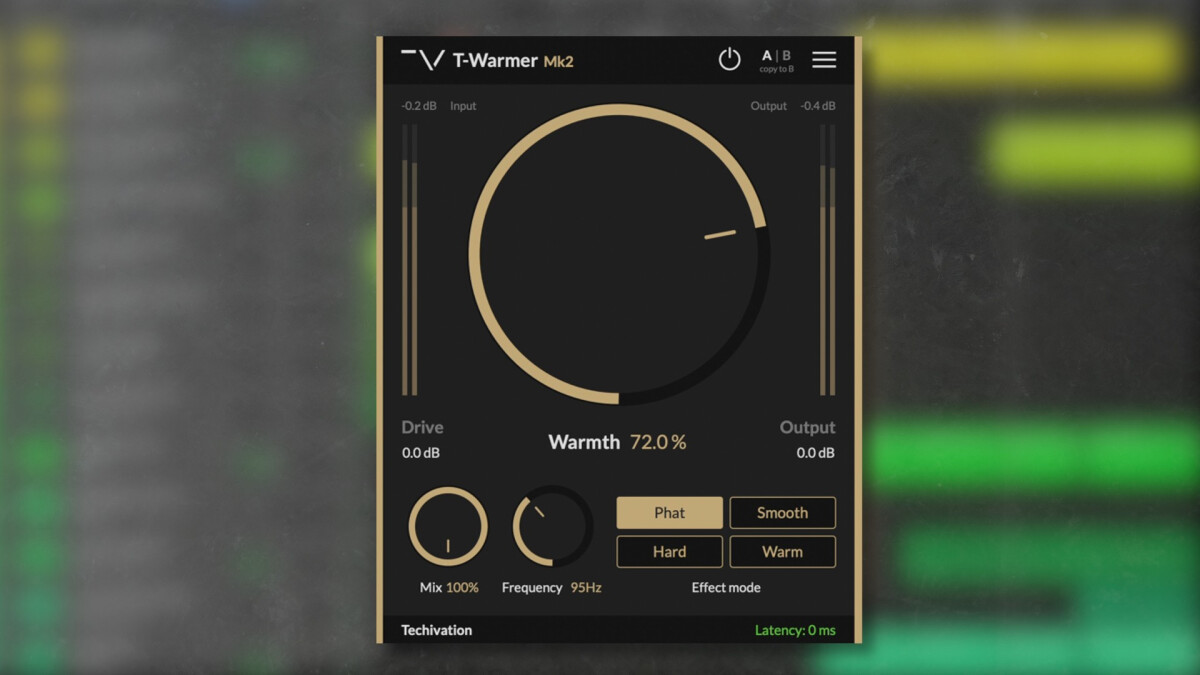
L’éditeur Techivation annonce la sortie du T-Warmer Mk2, une mise à jour de son outil de traitement du bas du spectre par saturation… Lire la suite sur Audiofanzine
CME has announced the start of production for the H12MIDI Pro, a compact standalone MIDI hub designed to simplify complex hardware and hybrid MIDI setups. The device combines USB Host connectivity, TRS MIDI I/O, and advanced routing capabilities in a portable aluminum enclosure.
The H12MIDI Pro features six USB-C Host ports supporting up to 16-in / 16-out virtual MIDI, allowing class-compliant USB MIDI devices such as keyboards, controllers, drum machines, and pedals to connect directly without a computer.
In addition, six TRS MIDI inputs and outputs (3.5 mm A/B) provide integration with a wide range of hardware synthesizers, modules, and MIDI equipment.
A dedicated USB-C Client port adds computer connectivity with 8-in / 8-out virtual MIDI, compatible with macOS, Windows, iOS, Android, Linux, and ChromeOS.
Advanced MIDI routing, filtering, mapping, and preset management are handled through CME’s HxMIDI Tools software, allowing creators to configure MIDI thru, split, merge, and message processing. All configurations are stored internally for reliable standalone operation.
The H12MIDI Pro also offers dual power options via USB-C (5V) or 9V DC, making it suitable for both studio setups and pedalboard installations.
Throughout the development process, CME worked closely with people who actively rely on MIDI technology in real-world studio and live environments. This collaborative approach ensures that the final product reflects practical needs while staying true to CME’s design philosophy: powerful MIDI tools that remain compact, flexible, and accessible without paying for features you don’t need.
Mr. Zhao Yitian, CEO
Presale started March 16, 2026, 4PM CET, and will run for 72 hours: